AppLovin MAX Mediation SDK (Android)
Overview
The Appier Mediation Adapter for AppLovin MAX enables seamless integration between Appier's ad solutions and the AppLovin MAX monetization platform. This guide provides step-by-step instructions to help you configure and implement the mediation adapter, ensuring optimal ad delivery and performance.
Before continuing, create an AppLovin account.
Supported ad formats
- Banner (320 x 50 dp)
- MREC (300 x 250 dp)
- Interstitial
- Native
- Small Template
- Medium Template
- Manual
SDK version requirements
Refer to the table below to see the compatible versions of the Appier Ads and AppLovin MAX Mediation SDK.
| Appier Ads Android SDK (standalone) | AppLovin MAX Mediation SDK |
|---|---|
| 2.1.0 | 2.1.0 |
1. Create an AppLovin MAX custom network and ad unit
Log in to the AppLovin console and complete the following:
1. Create a custom network
- Go to MAX > Meditation > Manage > Networks and add a custom network.
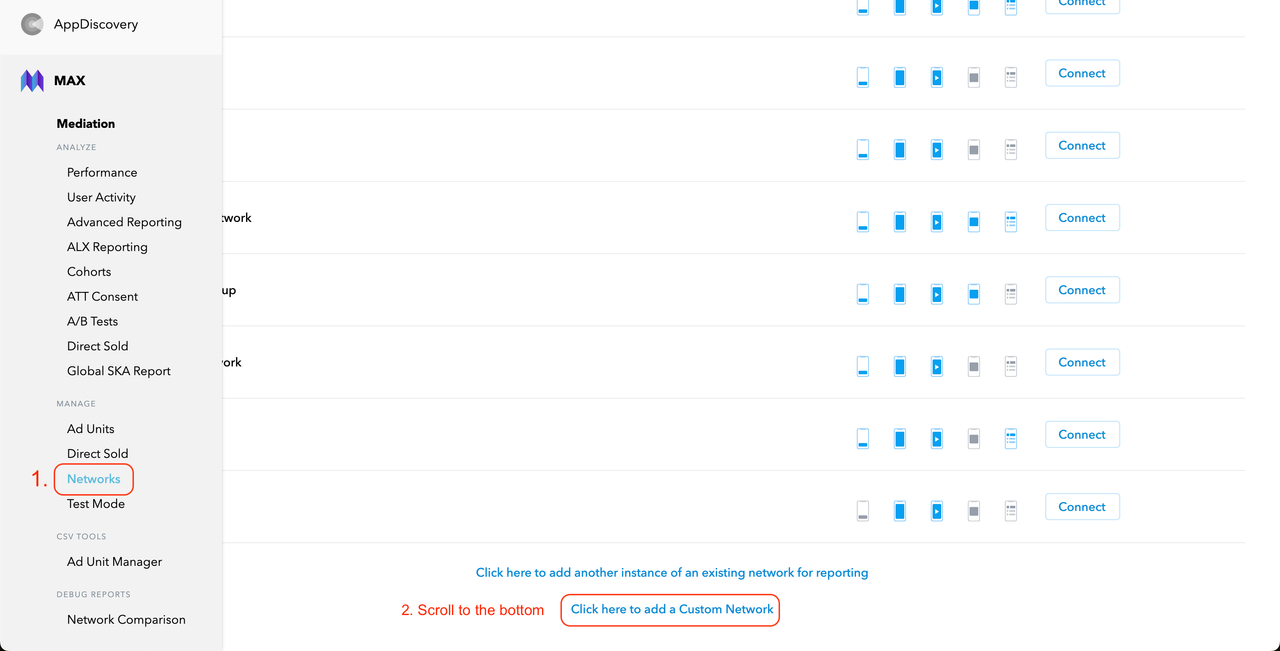
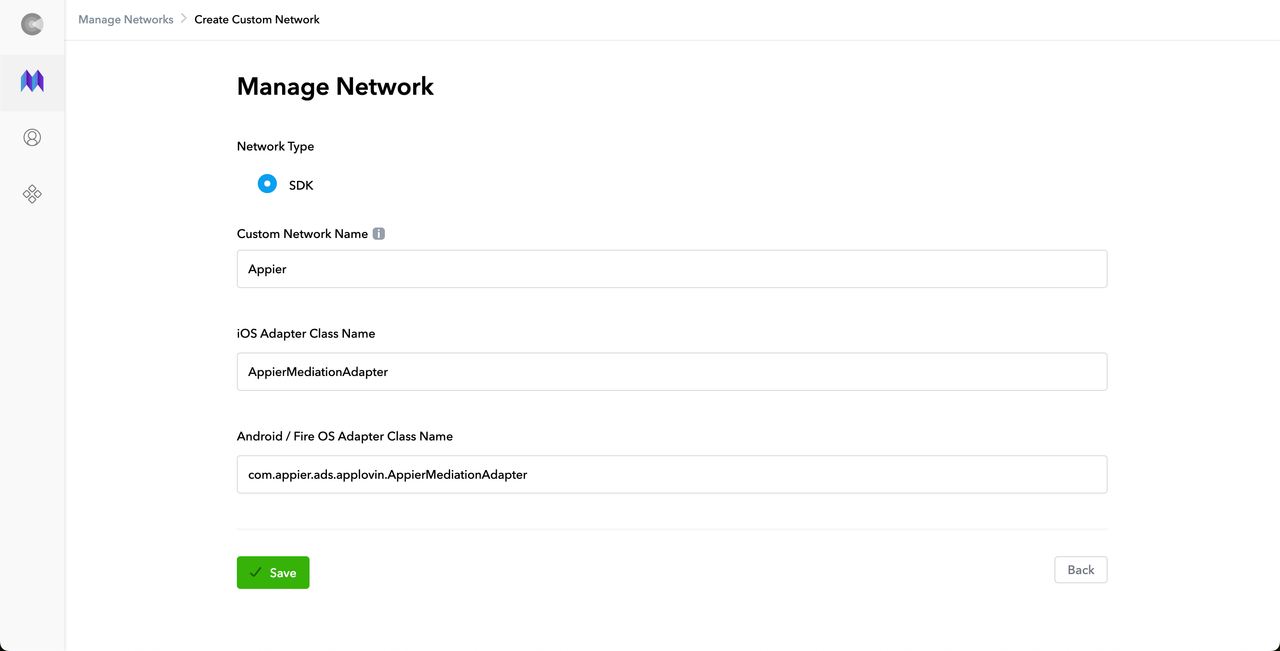
- Configure the following network settings:
- Custom Network Name: "Appier"
- Android/Fire OS Adapter Class Name: :"com.appier.ads.applovin.AppierMediationAdapter"
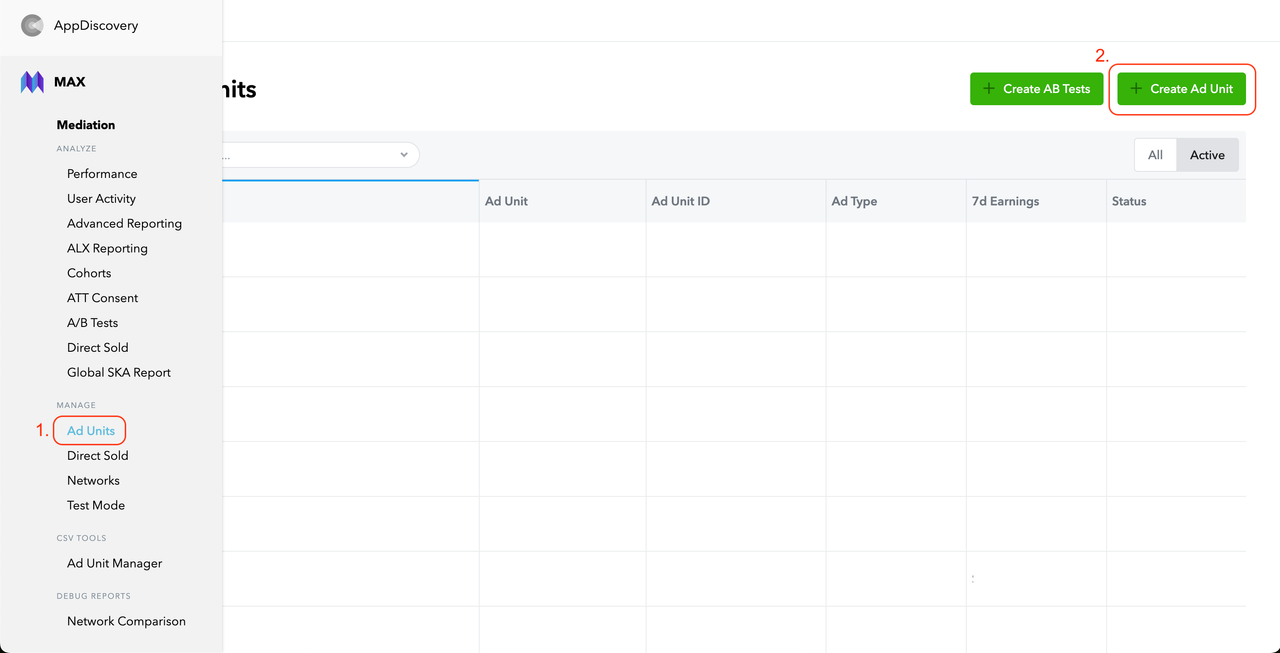
2. Create an ad unit
- Go to MAX > Meditation > Manage > Ad Units and click + Create Ad Unit.
- Enter a name, set the platform to Android, and select the ad type you want to create.
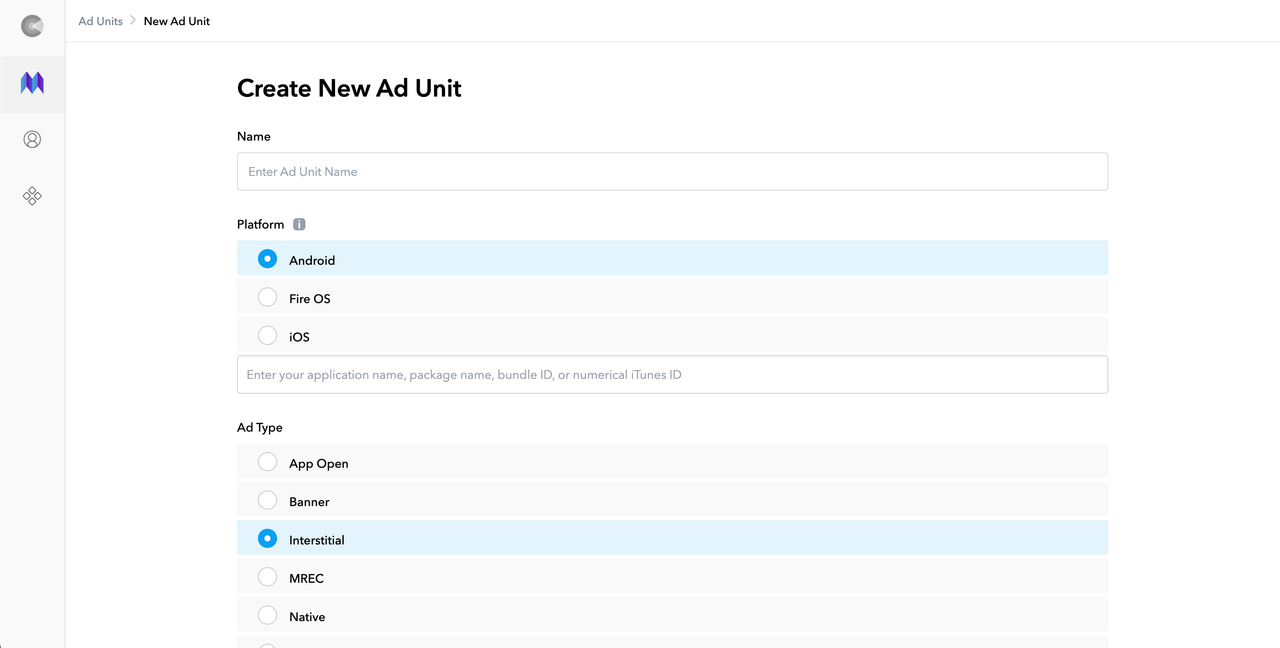
- If your app isn’t live yet, manually add it to MAX.
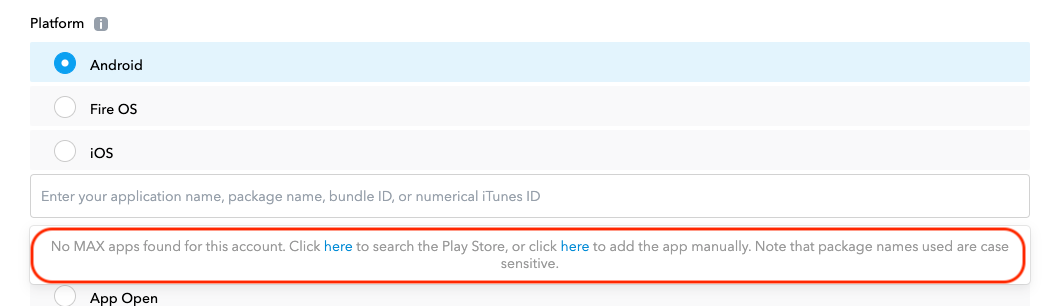
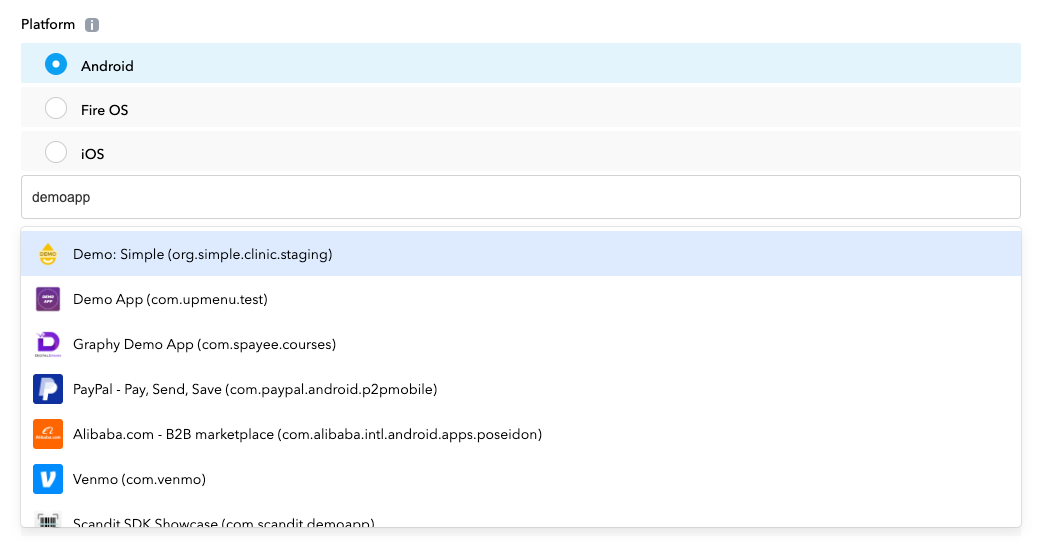
- Enter your application's name or package name in the input box and select it from the dropdown menu that appears.
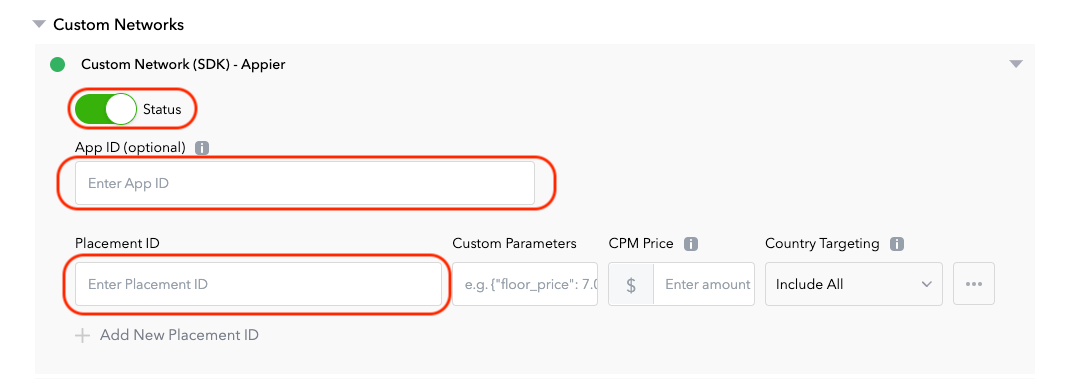
- Under Custom Networks, you'll see "Custom Network (SDK)—Appier". This is the custom network you created earlier. Configure the following settings:
- Enable the Status toggle.
- App ID (Optional): Enter your app's package name.
- Placement ID: Enter the placement ID provided by Appier.
- CPM Price: This value determines how adapters are traversed in the waterfall.
2. Configure your Android project
Next, configure your Android project's settings.
1. Set your app's minSDKVersion
minSDKVersionThe Appier Ads SDK requires a minSDKVersion or 18 or later.
2. Add dependencies and permissions
- Add the AppLovin MAX SDK and Appier Ads SDK to your Gradle file.
repositories {
  google()
  mavenCentral()
  ...
}
dependencies {
  implementation 'com.applovin:applovin-sdk:13.0.1'
  implementation 'com.appier:applovin-mediation:2.1.0'
  implementation 'com.appier:ads-android:2.1.0'
  ...
}- Add the following permissions to your app's manifest file.
<manifest ...>
  <uses-permission android:name="android.permission.INTERNET" />
  <uses-permission android:name="android.permission.ACCESS_NETWORK_STATE" />
  <!--  Required for displaying floating window  -->
  <uses-permission android:name="android.permission.SYSTEM_ALERT_WINDOW" />
  <application
    ...
    android:networkSecurityConfig="@xml/network_security_config">
  </application>
</manifest>- In
/resources, addxml/network_security_config.xmlwith the following configuration:
<?xml version="1.0" encoding="utf-8"?>
<network-security-config>
  <base-config cleartextTrafficPermitted="true" />
</network-security-config>
3. Add the ProGuard rule
In the ProGuard settings file, add the following rule:
-keep class com.appier.ads.**{ *; }4. (Recommended) Enable the GDRP consent prompt
The Appier Ads SDK doesn't request permission to track data by default. To comply with GDPR regulations, we strongly recommend enabling the data collection prompt by calling Appier.setGDPRApplies(true).
This only needs to be done once, ideally at app launch and before initializing the Appier Ads SDK.
import com.appier.ads.Appier;
public class MainActivity extends AppCompatActivity {
  	@Override
    protected void onCreate(Bundle savedInstanceState) {
      	// ...
      	Appier.setGDPRApplies(true);
    }
}
5. Initialize the AppLovin Android SDK
Initialize the AppLovin SDK as shown below:
class MainActivity : Activity()
{
  override fun onCreate(savedInstanceState: Bundle?)
  {
    // Create the initialization configuration
    val initConfig = AppLovinSdkInitializationConfiguration.builder("<APPLOVIN_SDK_KEY>", this)
                     .setMediationProvider(AppLovinMediationProvider.MAX)
                     .build()

    // Initialize the SDK with the configuration
    AppLovinSdk.getInstance(this).initialize(initConfig) { sdkConfig ->
      // Start loading ads
    }
  }
}For detailed instructions on initializing the AppLovin SDK, see New SDK Initialization API.
3. Implement AppLovin MAX Ads
Follow the guides provided by AppLovin to implement different ad formats. Refer to the table below for features and ad types that aren't supported by the Appier Ads SDK.
| Ad format | Notes | Implementation guide |
|---|---|---|
| Native Ads | The following features are not supported: • getMediaContentAspectRatio()• Star Rating | See AppLovin's guide for Native Ads. |
| Banner and MREC Ads | The following types of Banner and MREC Ads are supported: • Banner (Screen width x 50 dp) • MREC (300 x 250 dp) | See AppLovin's guide for Banner and MREC Ads. |
| Interstitial Ads | — | See AppLovin's guide for Interstitial Ads. |
Updated 8 months ago