Banner
APN (Banner)
Version | Update Content | Date |
|---|---|---|
1.0 | Initial Version |
About this Document
This guide illustrates the steps of integrating APN (Banner) using Javascript code.
Limitation:
- Currently we only support 1 size per ad unit.
- Currently we only support integration with DFP/non-DFP.
Note:
- This is NOT the business contract of Advertising with Appier.
Contents
I. Appier Ad unit ID Information
II. Setting up your Ad Server
III. Setting up your code
IV. (Optional) Setting up Passback
I. Appier Ad unit ID Information
For each Ad unit there will be a name and an ID Number provided to you by Appier, example below:
- Ad unit Name: Name that corresponds to an ad unit in Appier's system.
- Ad unit ID: ID that corresponds to an ad unit in Appier's system.
- HAID: hashed value of Publisher ID in Appier's system, hashed for security purposes.
- HZID: hashed value of Ad unit ID, hashed for security purposes.
- Header Code: Code to insert in your website header.
- Invocation Code: code that needs to be integrated into your website or Ad Server to show the Ad.
NOTE: The code/info provided in this table are for reference only, to get your real code, please contact Appier support team.
Ad unit Name | Ad unit ID | HAID | HZID | Key-Value | Header Code | Invocation Code |
|---|---|---|---|---|---|---|
Example_Ad_unit | ExampleAdUnitID | ExampleHAID | ExampleHZID | exampleKey-1 | | |
II. Setting up your Ad Server
Steps
- DFP
a. Create an ad unit
b. Create your key-value pairs
c. Create a line item
d. Create the creative - non-DFP
1. DFP
a. Create an ad unit
Go to Inventory > Ad units and click on new ad unit.
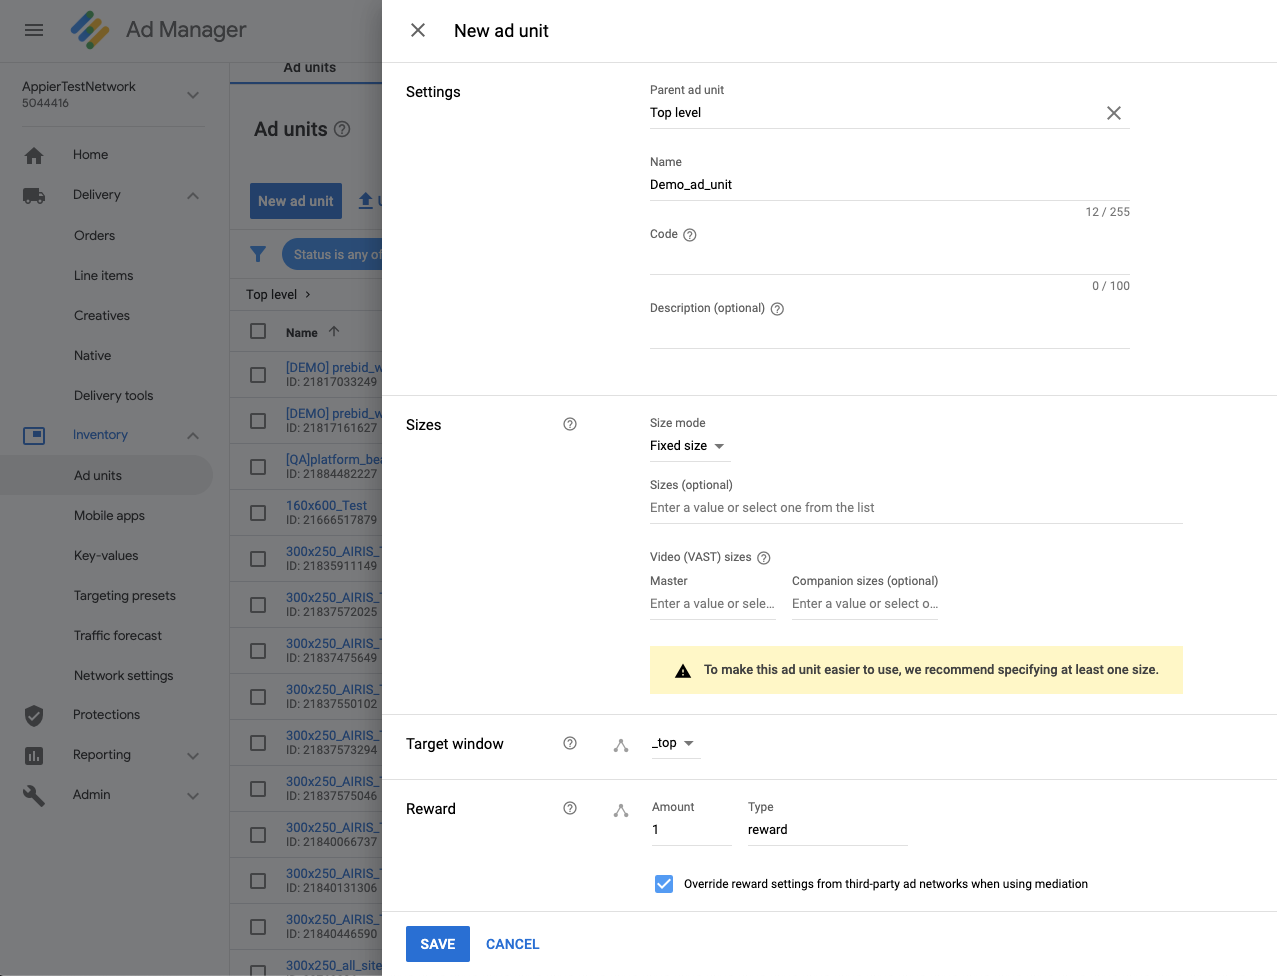
Click on SAVE once you filled out the name, parent ad unit, and ad sizes (please make sure that this ad unit matches the ad unit from Appier).
b. Create your key-value pairs
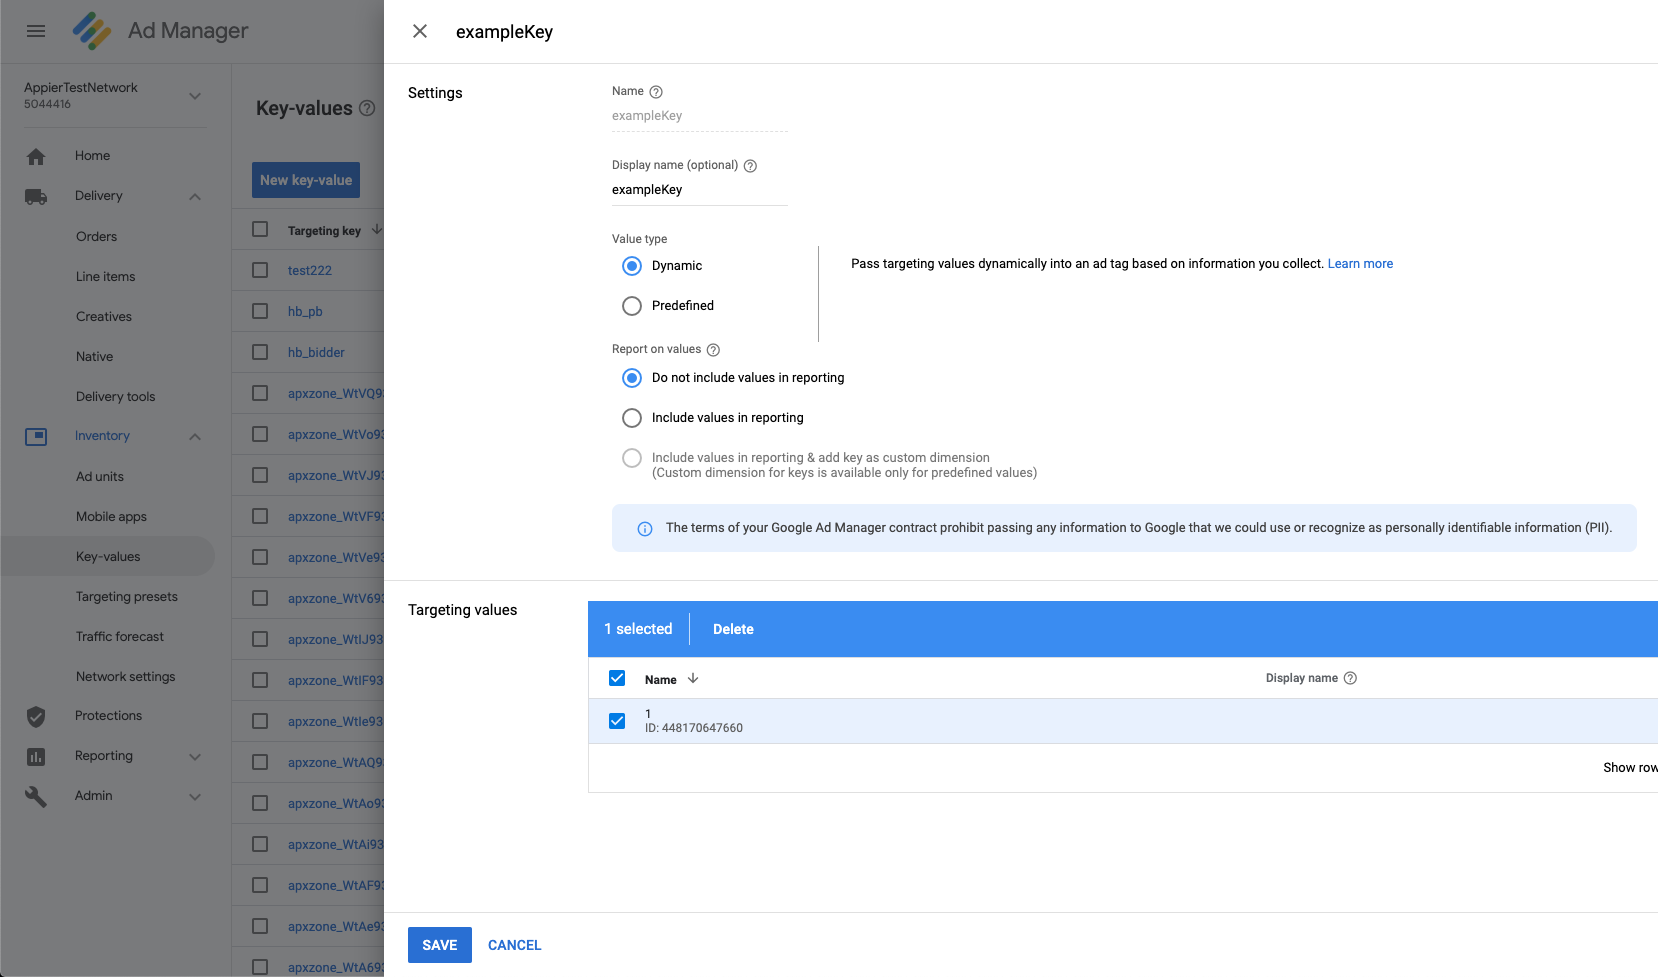
Go to Inventory > Key-values and create a new key-value with the key name from Section I and the value of 1 (in this case exampleKey=1).
c. Create a line item
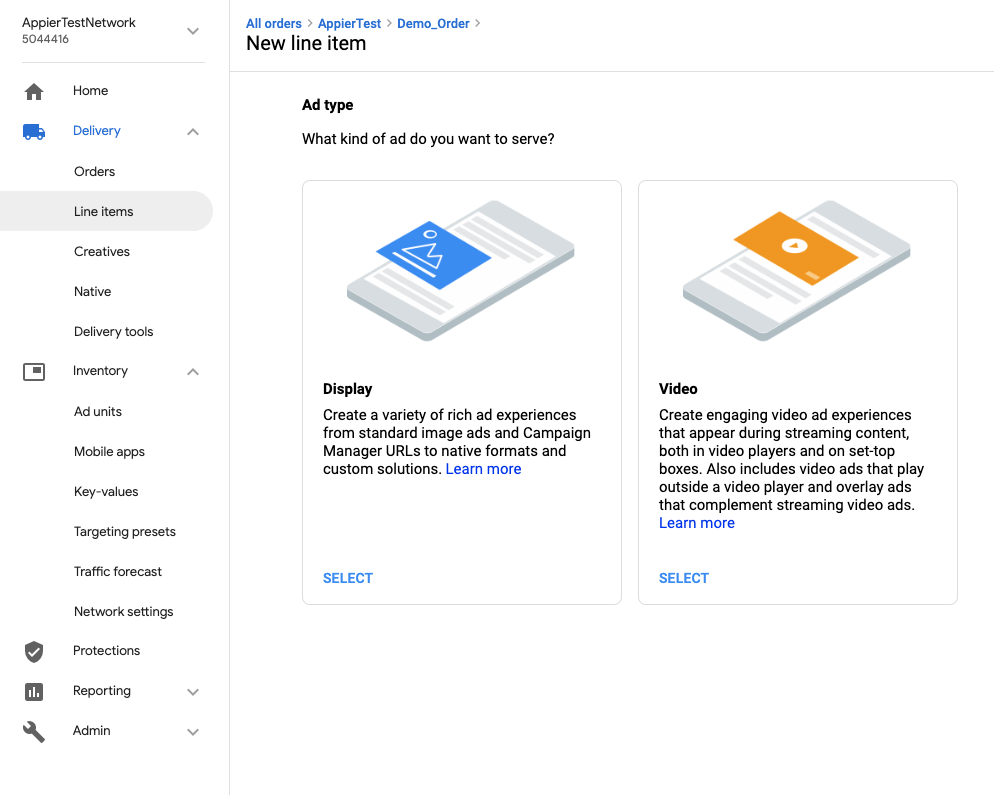
Create an order for Appier if you don't already have one and create a line item, choose Display
Pick your Priority and priority value based on your contract with Appier.
Add the size that you want (make sure it matches with the Appier ad unit!) to show for this line item and set the Delivery settings to Immediately
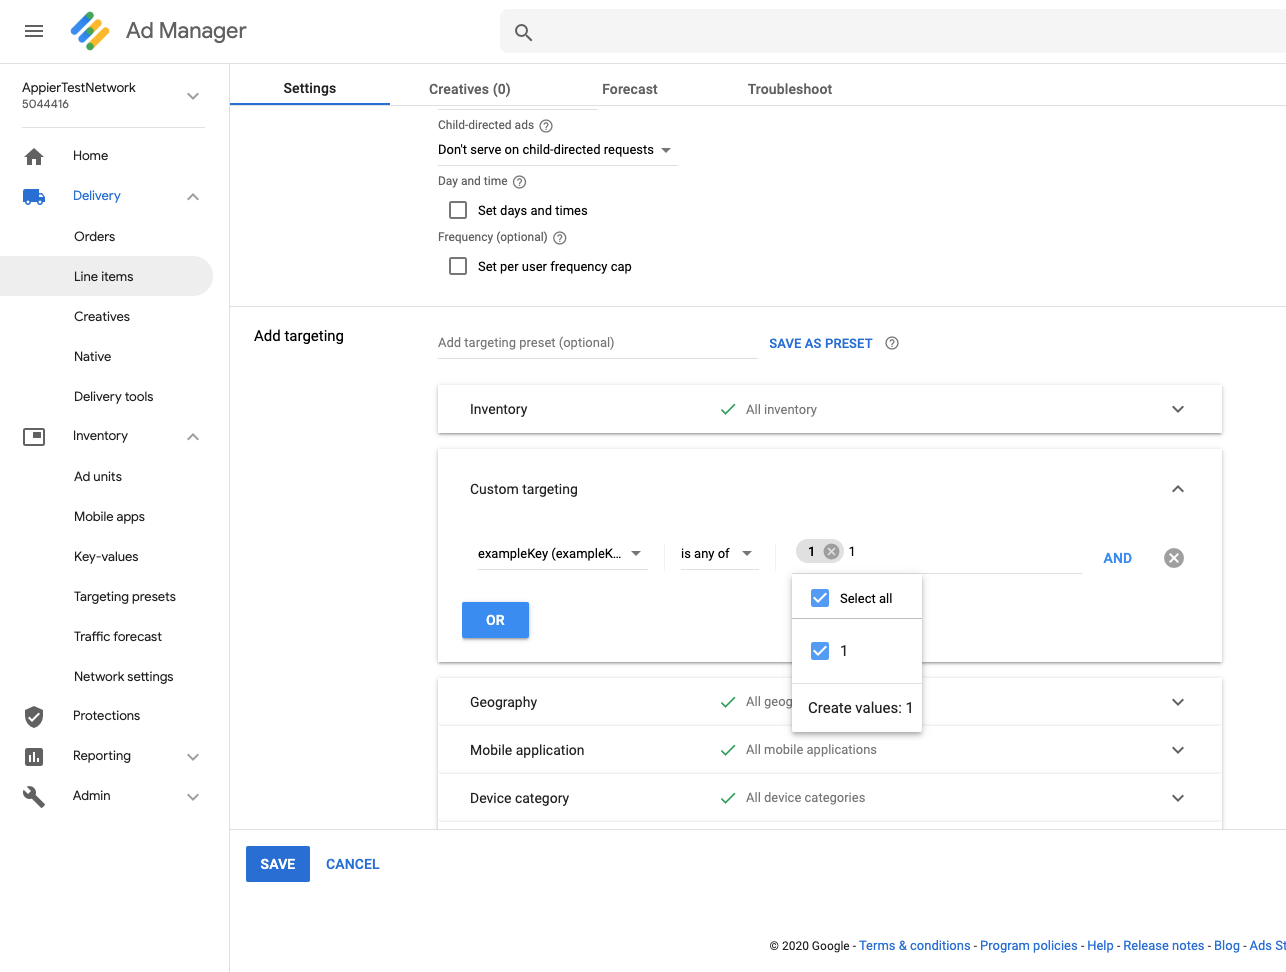
Lastly, set up your key-values, click on Show more in the "Add targeting" and click on Custom Targeting. Select the key-value that you just created and select the value to be 1.
d. Create the creative
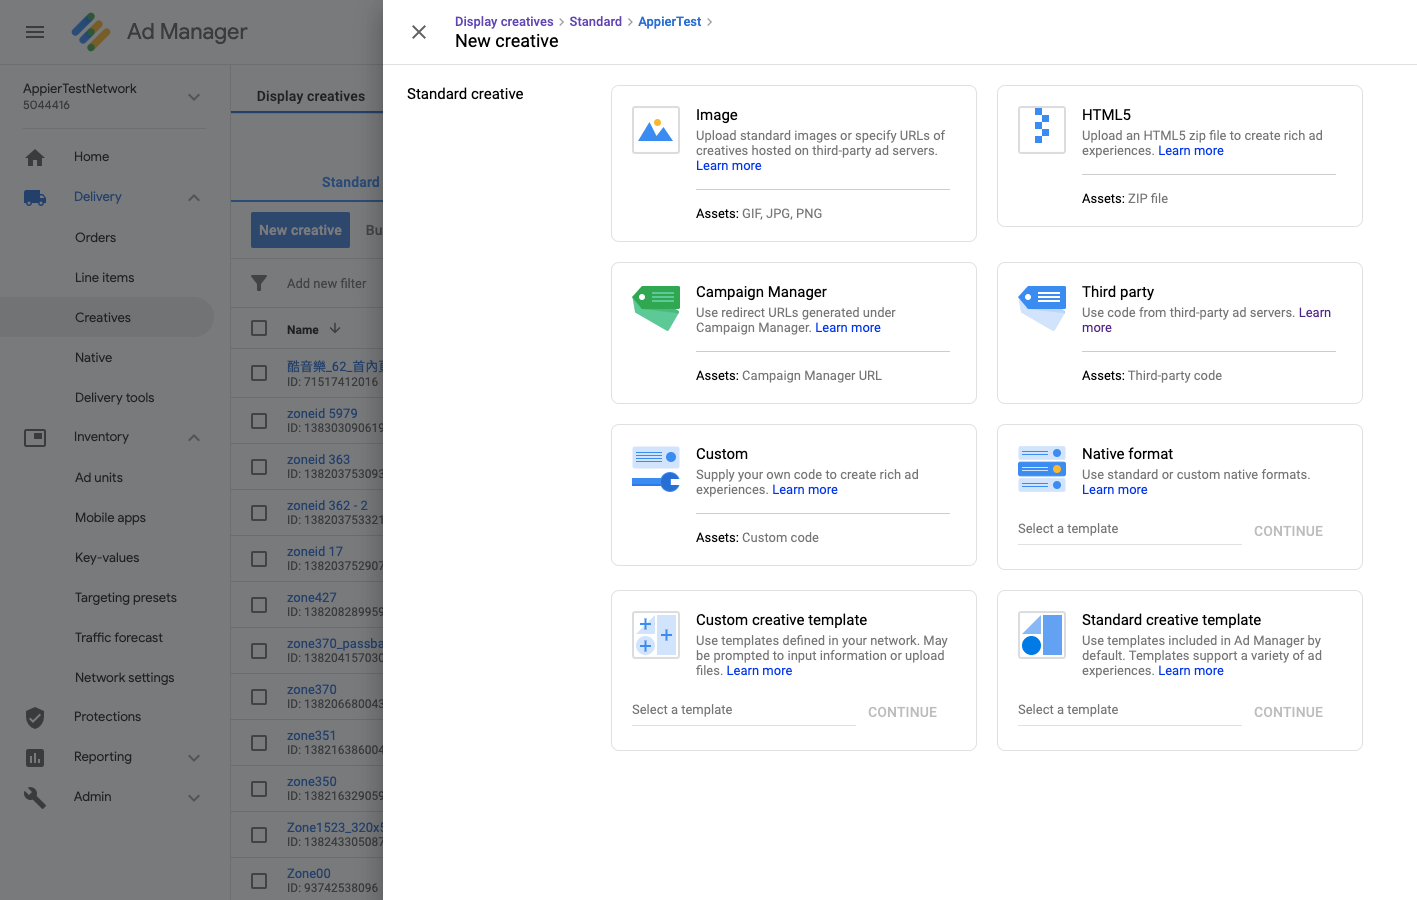
Set up your creative by going to Delivery > Creatives. Click on New Creative and click on Third Party
Enter the Name, the target ad unit size.
Copy and paste the Invocation Code provided by Appier in Section I into the Code Snippet box, don't worry if there is a warning.
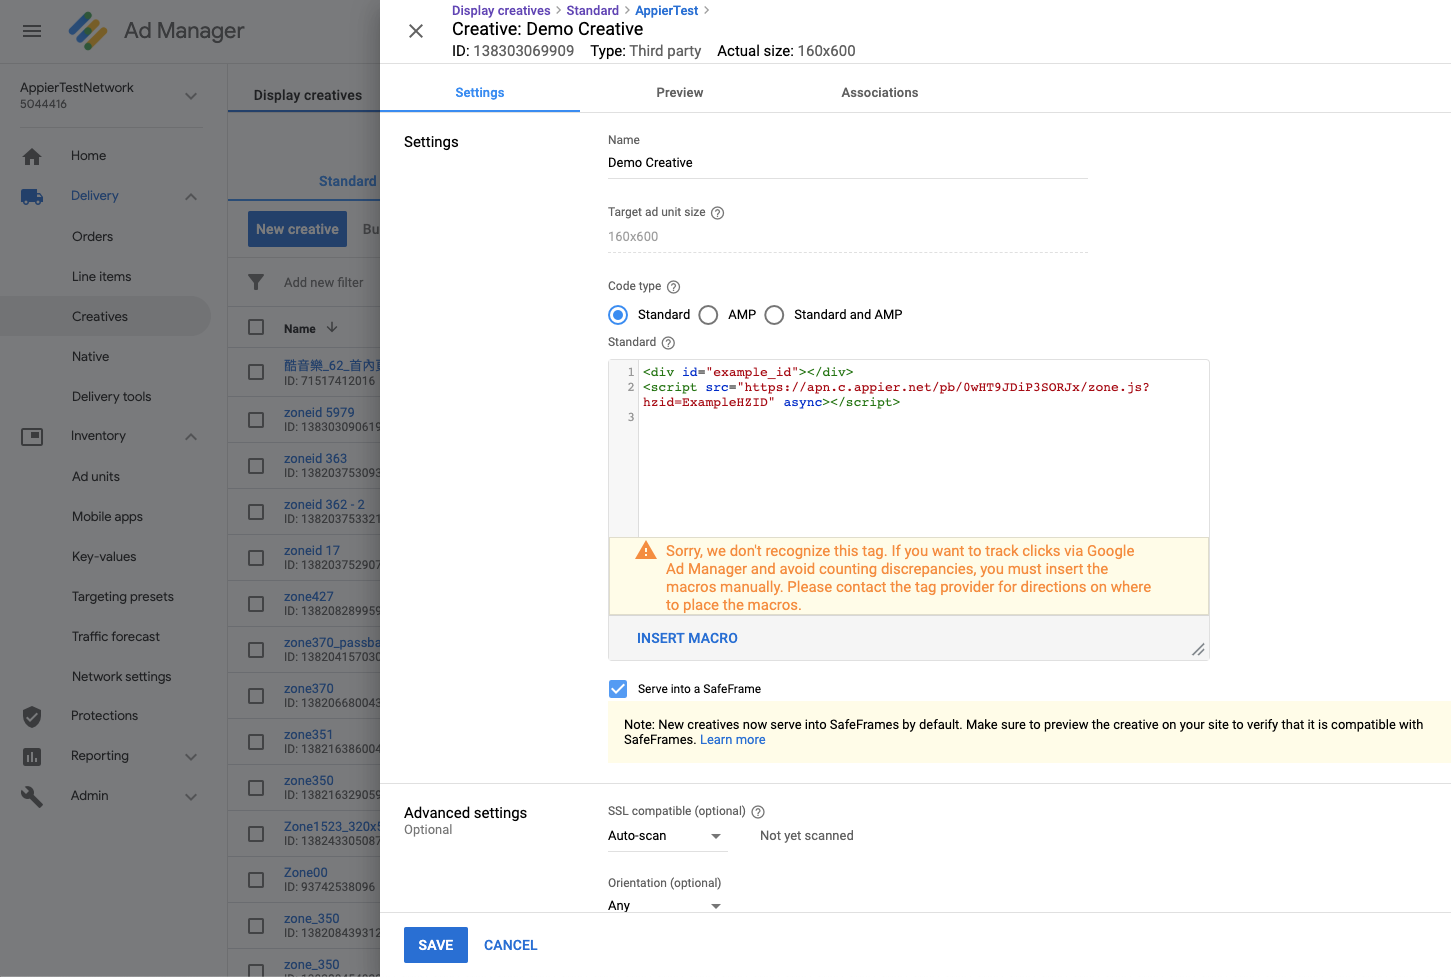
Click Save, then click on Associations to bind the line item you just created to this creative.
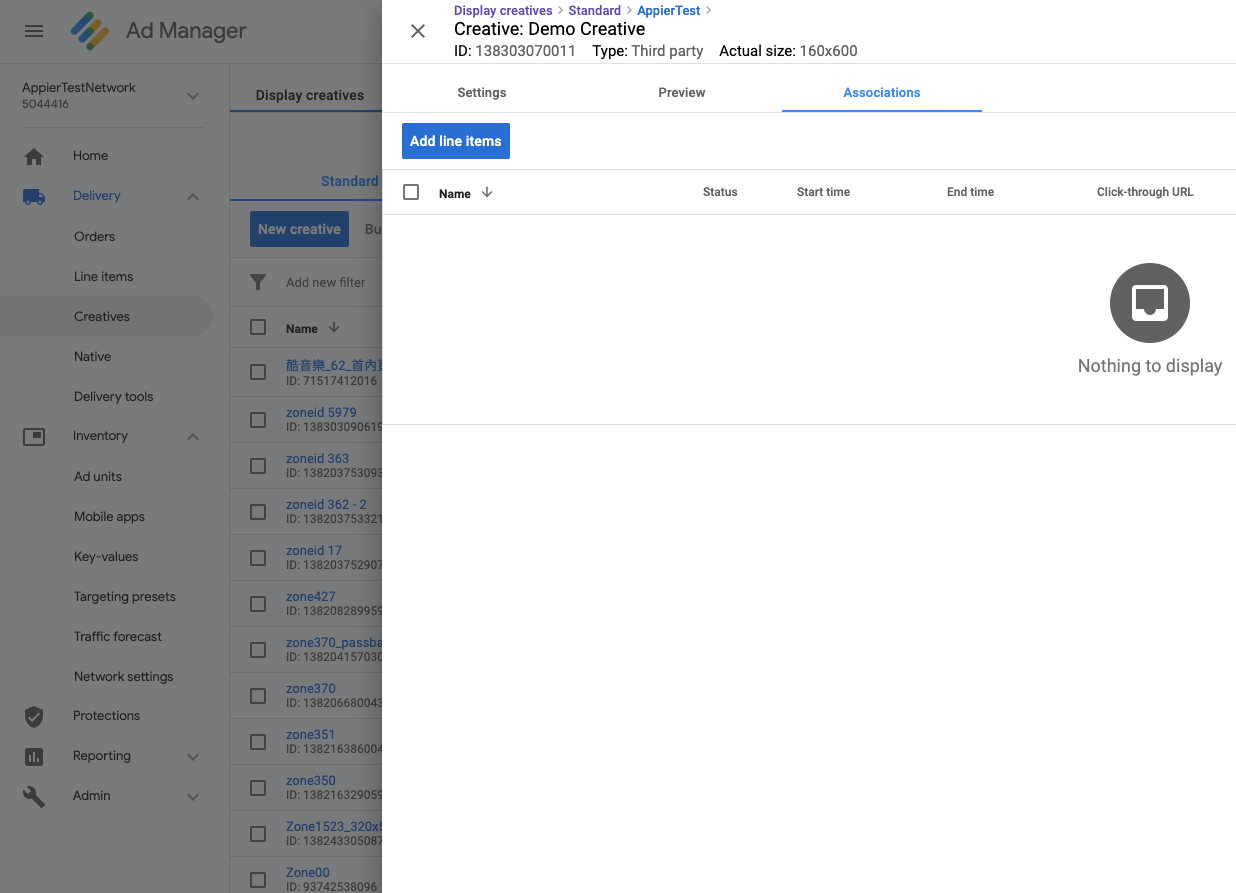
That's it!!
2. non-DFP
Insert your Invocation Code directly into the
tag within your website.III. Setting up your code
If you've completed Section II then you've already completed setting up your invocation code.
All that's left is to insert you Header Code from Section I into your website header (ie. between
tags)IV. (Optional) Setting up Passback
Methods (CHOOSE 1)
- Let Appier handle the passback
- Handle the passback yourself
1. Let Appier handle the passback
Please provide the passback code to Appier support team and we'll set it up for you.
2. Handle the passback yourself
You can choose to either:
- Handle the passback within your own code
OR - Input the passback in the Appier Publisher Portal
Updated about 2 months ago
